Thursday, November 7, 2024
Step-by-step process for building a firewood storage shed at home

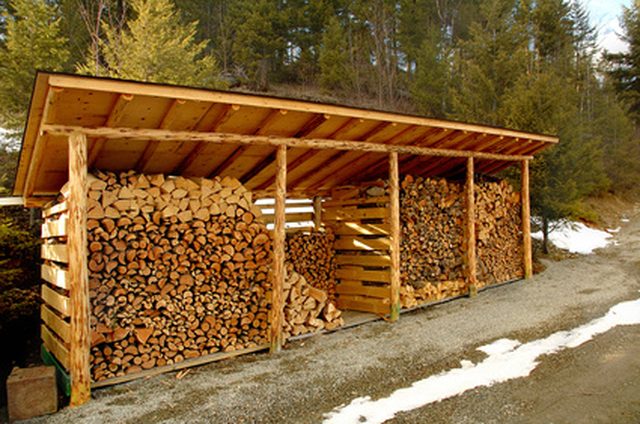
Alright, so you want to build a firewood storage shed, huh? Good choice! Not only will it keep your firewood dry and ready to burn, but it'll also look pretty darn good in your backyard. Let's get into it, step by step, and by the time we're done, you'll be a bona fide shed builder!
1. Planning Your Firewood Fortress:
Size Matters: First things first, figure out how much firewood you need to store. Think about how much you burn in a typical season and add a little extra for those chilly days. A shed around 4' x 8' or 6' x 8' will handle most homeowners' needs.
Location, Location, Location: Choose a spot that's close to your fireplace or wood stove, but also consider drainage. You don't want your firewood soaking in rainwater. Also, make sure there's plenty of room to access the shed and maneuver your firewood.
Design Delight: Think about the style you want. Do you want something simple and functional, or do you dream of a rustic, fancy shed? Sketch out your ideas and maybe even check out some online resources for inspiration.
2. Gathering Your Tools and Materials:
Wood's Your Buddy: You'll need pressure-treated lumber for the foundation and floor to resist rot. For the walls and roof, you can choose a wood like cedar, redwood, or even pine.
Foundation Fixings: Concrete blocks or a simple gravel bed will create a solid base for your shed.
Framing Fanatics: You'll need 2x4s or 2x6s for the framing, depending on your design and the size of your shed.
Roofing Rhapsody: Asphalt shingles are a popular and affordable option. You'll also need plywood sheathing, roofing felt, and nails.
Finishing Touches: Staining or painting your shed will protect it from the elements and give it a polished look.
3. Foundation First:
Laying the Groundwork: Mark out the dimensions of your shed and level the ground.
Concrete Blocks: If you're going with concrete blocks, you'll need to create a base of compacted gravel for drainage. Then, carefully set the blocks in place, making sure they're level. You can use mortar to secure them for added strength.
Gravel Bed: For a simpler foundation, create a thick bed of gravel, ensuring it's level and compacted. This will provide drainage and a solid base for the floor.
4. Building the Floor:
Framing the Floor: Cut and assemble your floor joists using 2x4s or 2x6s, depending on the size of your shed. Space the joists about 16 inches apart for optimal support.
Plywood Perfection: Once the joists are in place, lay down a layer of plywood for your floor. Use screws or nails to secure the plywood, making sure it's flush with the edges of the joists.
5. Wall Construction:
Framing the Walls: Cut and assemble the wall studs using 2x4s or 2x6s, ensuring they are plumb and level. You can use a stud finder or a tape measure to mark out the locations for the studs.
Sheathing Strong: Once the walls are framed, cover them with plywood sheathing for added strength and stability.
Roofing Rhapsody: Now, it's time to frame your roof! Cut and assemble the rafters using 2x4s or 2x6s, depending on the size of your shed. Attach them to the walls with joist hangers or nails.
6. Roofin' Around:
Sheathing the Roof: Cover the rafters with plywood sheathing, creating a solid foundation for your roofing material.
Roofing Felt: Lay down roofing felt over the plywood sheathing, allowing it to overlap for watertight protection.
Shingle Showdown: Now, it's time to install your shingles! Start at the bottom and work your way up, making sure the shingles are properly overlapped and nailed securely.
7. Final Touches:
Doors and Windows: Install your doors and windows, adding a decorative touch while providing ventilation and access.
Staining or Painting: Give your shed a beautiful finish with a stain or paint that complements your backyard and protects it from the elements.
Door Handle and Hinges: Make sure your door opens and closes smoothly, adding a strong handle and reliable hinges.
8. Finishing Up:
Clean Up and Celebrate! Once the shed is complete, tidy up the area and give yourself a pat on the back. You've built a sturdy and stylish firewood storage shed!
Storage Solutions: Consider adding shelves or racks inside your shed for organizing your firewood and maximizing space.
Firewood Fun: Now, you can enjoy the convenience of a dry and organized firewood supply, ready to fuel your cozy evenings by the fire.
Tips and Tricks:
Safety First: Always wear safety glasses and gloves when working with tools and wood.
Measure Twice, Cut Once: Take your time measuring and cutting, and avoid mistakes!
Don't Be Afraid to Ask for Help: If you need assistance with any part of the project, don't hesitate to ask a friend or family member for help.
Now, go out there and start building your firewood storage shed! You got this! Remember, the most important thing is to enjoy the process and take pride in your accomplishment. And when you're done, you'll have a fantastic space to keep your firewood cozy and ready for those chilly evenings.
No comments:
Post a Comment
Note: Only a member of this blog may post a comment.